Saturday, February 27, 2010

A Month of Love and Luck

February turned out to be quite the month. While the grays and browns all around attempted to steal our inspiration, the blogging world pull through, as usual. Giveaways, swaps, tutorials, guides, and links rescued me from going seriously house crazy. I even had a little luck this month, too.

Until now, my only brush with luck was winning a raffle at my university's health fair. The prize? A first-aid kit. I remember being a little disappointed that I had used up all my luck on a couple of gauze pads and an ace bandage. (It's worth mentioning that I put that first-aid kit to good use a year later in South Africa. Guess I won that for a reason, in hind sight.)

Flash forward to a few weeks ago when I won this brooch in a giveaway from Emily at Mousey Brown's House. Emily custom designed this pin, taking in to account my favorite colors and thoughtfully including a metal-rimmed button, as a nod to my works in metal. She rocks.

Then, I won this luxurious yarn last week from a Soulemama giveaway. This 100% Merino Wool from The Spun Monkey is so much softer and more beautiful than it looks in this photo. The colorway (Cloud Bunny) would be so perfect for a baby gift that's on my to do list, but I am not so sure now. That yarn may just have to stay in my household.

Luck aside, there was also lots of love going around in February, of course, and this year much of it landed in my mailbox. Gardenmama organized a valentine swap, so I jumped on the chance to participate in it (and then wondered why I would add something else to the above mentioned to do list). Truth is, I signed up because it was another excuse to create something that wasn't filling an order or slated to be sold. A chance to make something I would be exchanging with a group of women who inspire me endlessly.

Little did I know what a treat I was in for. Each valentine that arrived was original, creative, and thoughtful. So much more than I ever expected—they are all so very generous and genuine. I was running to the mailbox everyday, hoping another little masterpiece had arrived. Let me introduce you to these artists, mothers, crafters, photographers, writers and all-around creative and inspirational gals. Meet Kerry, Lisa, Stephanie, Pennie, Tonya, Stacey, Kristin, Nicole, Nicola, and Amy. Thanks ladies!

Friday, February 26, 2010

Slop

A mid-winter storm featuring 5 days of rain is leaving us with a whole lotta slop to wade through.

Luckily, this weather was not nearly as hard on the humans as it was for the snowman in our backyard.

Happy Friday!

Tuesday, February 23, 2010

Block Printing Tutorial, Part II

The exciting part of block print making is...the printing! You've painstakingly cut away your design and now you're ready to see what your design actually looks like.

Start by covering your work surface with newspapers or plastic, for easy clean up. Put a little dollop of ink on a glass palate (a glass baking/casserole/pie dish works fine, too)— I recommend using water-based printing ink, as it is completely washable and non-toxic. Be careful here, and start with less ink than you think you'd need—a little goes a long way. Roll the brayer through the ink in different directions. Try to spread a thin, even layer of ink on the glass. Next, using steady pressure, roll the brayer over your linoleum, first back and forth, then side to side. Be sure to cover right to the edges and corners of your design.

Next move the linoleum to a clean work surface, ink side up, and place the paper over it. Take an extra moment to line the paper up square with your print before you lay it down.

Gently rub the paper with your hand or, if you have an extra, clean brayer, use that (I bet a rolling pin would be great for this job). Keep your hand flat when rubbing, so you don't press down into the cuts of the design and end up printing something you didn't want (ink can sometimes get into the depressions).

Carefully lift the paper off, pulling from one side. You can take a peek at the print before you lift it off completely, and see if there are any areas that could use a little more rubbing.

The amount of ink you use makes a significant difference in the quality of the print (as shown above), so experiment until you get the look you want.

Now that you have your first print, you can see if there is anything you want to change—raised areas to remove, shapes to refine, design elements or details to add.

Yay, a print! Make as many as you want. Create a custom set of cards as a gift, make tiny prints and use them like stamps. Explore multi-color printing, or try embellishing your black-ink prints with colored pencil. Make limited-edition prints and give them to friends (tell 'em they'll be worth money someday when you are a famous block-print artist).

Useful info I forgot to include in my Block Printing Part I post: Because the linoleum is hard and can be difficult to cut away, heating it up will make it more pliable, and much easier to remove. Toss it in the microwave for 10 seconds, blow a hot hair dryer on it for a minute, or place it in the sun for a while before you start.

Sunday, February 21, 2010

Block Printing Tutorial: Part I

I decided to put together a block printing how-to, after getting lots of comments and emails from people expressing interest. It's a cinch to get into, as it requires only a bit of equipment to begin with. Block printing is a fascinating technique that presents new artistic opportunities to explore. Getting to the final product is a unique process that moves from sculptural to two-dimensional.

You'll need a linoleum cutting tool and some cutting tips, a few pieces of linoleum, a brayer, and some block printing ink. I found a great starter kit, which includes everything you need, here.

Draw your image directly onto the piece of linoleum. Start removing the material, little by little, always pulling away from the item you are carving, and towards your body. Keep the fingers of the other hand clear of the path of the cutter, as it can slip. Rotate the linoleum as necessary to make this easier.

The linoleum can sometimes be tricky to remove, but the way the tool is held is important and the process will go much smoother if you do it right. Hold the cutter so that the ball of the handle rests in your palm, and use your pointer finger to help guide and control the tool. Hold the tool at only a slight angle and pull gently. If you have the correct angle, you will feel the cutter doing the work and you won't have to pull so hard. It will take some time to get a feel for this. Keep a gentle grip on the cutter. It's easy to find yourself holding the cutter too tight which will result in deep cuts and a sore, tired hand.

A word about words: keep in mind that any words you include need to be carved in mirror image (see previous images), lest you end up with this.

Continue to remove the material, using a variation of cutting tips as needed to get the desired image. Explore texture and negative space, as well as composition and design, and have fun!

Linoleum pieces can also be purchased mounted on wood, and I find that the mounted pieces are a little easier for the kids to use—it's more for them to hold onto as they carve. Alternatively, you can mount a piece of linoleum onto wood yourself with some contact cement.

That's the cutting/carving portion of block printing in a nutshell. My next post will describe the inking and printing process.

Friday, February 19, 2010

This Week

School vacations are perfectly timed. Just as the daily process starts to get weary, a chance to change up the routine saves the day. And, though we did we did not escape to the mountains, or go anywhere for longer than a day, we took the opportunity to flip the days on end. There were a couple of days the girls never got out of their pjs, there was a trip to the Museum of Science, and a ride to Cape Cod. We had junk food for breakfast one morning, and a breakfast with the works the next. The girls have been staying up late, watching the Olympics with us, and cheering on team USA (we are serious Olympics geeks).

The calendar for this week was blank—not a single note or appointment scribbled down. It's only natural that a week like this would spawn a few creative undertakings. Take a peek into our house this week:

A set of custom pins, nearing completion (more on this soon)

Thumb print art, with Ed Emberley's Great Thumbprint Drawing Book.

A stash-busting work in progress

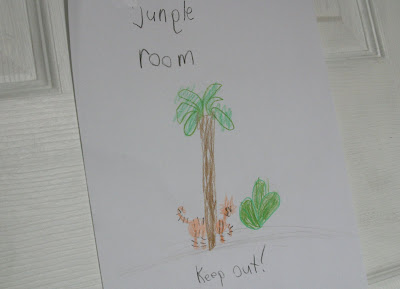
And a bedroom makeover, apparently

But we're not done yet. We will be squeezing as much as we can into the final few days before we return to the grind. What have you been up to?

Tuesday, February 16, 2010

Use It or Lose It: Anything Quesadilla

The second recipe in my Use It Or Lose It series is the Anything Quesadilla. It's filled with whatever produce you have, or need to use up before it goes bad.

I fished through my fridge and found spinach who's days are numbered, the end of a red cabbage, some wilting green onions, and a lime that was past its prime. I also added a handful of frozen corn. For the cheese, I used grated cheddar and some feta cheese crumbles, but any cheese will do.

Chop everything up and saute in a bit of olive oil until the veggies are heated through or cooked to your liking. Squeeze some lime juice over everything, add in some cayenne for a little heat, and some sea salt.

Place one corn tortilla (four tortillas are good, too) on a pan, sprinkle with cheese, add the cooked veggies and then place a second tortilla on top.

Over medium-low heat, cook until the cheese is melted and the tortilla is slightly browned and crisped. Using a spatula, flip the quesadilla over to cook the other side.

Remove from heat and cut in half or into quarters. Enjoy it plain or with your favorite toppings—sour cream and salsa are delicious with it.

This recipe is wide open. Some more possibilities include leftover meats, cooked potatoes, beans, root vegetables, or a mix of cheeses. A breakfast version of this is excellent. The combination of eggs, cheese, chopped veggies, and salsa are my favorite weekend-morning meal.

Friday, February 12, 2010

One Small...Bag

I'm a little late with posting our February project for One Small Change, so here it is:
Last month, our "change" was to waste less food. This month, we have challenged ourselves to fill only one "tall kitchen" size trash bag each week.

Two bags every week for a family of four seems like too much. We recycle heavily—all of our paper, tin, plastic and glass go in the bin, so it puzzles me that we can fill up two whole bags of trash. With what, exactly? Well, I couldn't say. So I looked. And took a picture (sorry). Turns out it's mostly food packaging—empty coffee k-cups, butter wrappers, pita bread packaging, bags from frozen produce, and random non-recyclables the girls bring home from school (valentine's candy packages, today).

The number of trash bags we drag to the curb each week is the true measure of how much waste my family creates in seven days. So, by limiting the number of bags we fill, we are sure to be more conscious of the amount of disposable items we bring into the house and, ultimately, haul out of the house.
Please rest assured. This is the last time I write will about, and post pictures of, our trash.

Tuesday, February 9, 2010

The Biga, The Better

I am from Boston, but I don't mean "biggah," I'm talking about biga, a bread starter. Cousin to the sourdough starter, the biga is the key ingredient used in Italian-style country breads like ciabatta and pagnotta. It adds flavor and gives a crisp crust and moist chewy inside that, until now, I had only enjoyed in store-bought loaves.

It's a bit of a process, this biga business, but I found a recipe for a two-week biga in The Bread Lover's Bread Machine Cookbook, that makes a large batch that you can pull from for...two weeks.

A dough made with a biga is somewhat sticky, soft, and invitingly smooth. This batch made a delicious round loaf we devoured with pasta and broccoli. Pictured below are the rolls we ate with soup. Really though? It was more like the soup that accompanied the rolls. So good.

We have been baking our own bread for years now—sandwich breads, baguettes, rolls and sweet breads, but I have never been able to match that certain something found in country breads from the bakery. Bread with a crisp, knobby crust, airy inside, and deep flavor seemed out of my reach. Not so, anymore, now that I have tapped into the Italian in me. And just as the author of the recipe I followed predicted, I will never be without it. Best part is I still have another eight days to use the biga in my fridge.


I found a good history of the biga and instructions to make one here.

Sunday, February 7, 2010

Mid-Winter Bits

Each February, just as the winter doldrums start to settle in, the kind folks at the seed companies throw us a bone and send out the seed catalogs. Those coveted booklets land in our mailbox reassuring us that spring is on its way.

We pour over them, making unrealistic lists of what we'll grow—giant watermelons, tiny yellow tomatoes, purple string beans, and white eggplants. We get all starry-eyed and forget the size of our garden. No matter, though. We can dream of bigger-than-life gardens while we're snuggled up warm inside. And anyway, we add a new raised bed almost every year, as a direct result of our overzealous seed ordering. The promise of spring that comes with these catalogs is infectious. And once those seeds are sprouting in their cups, there is no looking back.

Speaking of the winter blahs, I had a good dose of action this past weekend at the aptly named artisan show, Cabin Fever. It brought lots of shoppers looking for Valentine's Day fodder and a chance to get out and about. A few new pieces I had been working on made their debut there, like these Cuff Rings.

Oh, Valentines, Day. I am not crazy about this "holiday" but I have to admit, I do love the colors and art that comes with it. The girls and I were looking at some cute illustrations the other day and we came across a painting of a bowl full of hearts. I commented that I would love to have a bowl of hearts like that, and the girls giggled, "we have a bowl of hearts, Mama!" They were right. We did, in fact, have a bowl of hearts right on the table. A big bunch of multicolored salt-dough hearts, made for classmates.

School vacation is next week and soon, it'll be March. Then it's all crocuses and daffodils, Easter eggs and jellybeans. And seedlings, of course—maybe my favorite thing about winter.

Friday, February 5, 2010

Notes from the Bench

chaos [key-os]
–noun
1. a state of utter confusion or disorder; a total lack of organization or order.
2. any confused, disorderly mass: a chaos of meaningless phrases.
(definition from dictionary.com)

...and that pretty much sums up the news from my bench. I have been fabricating like mad the past few weeks, preparing for the Cabin Fever Indie Gift Show. My workshop has been reduced to a tangle of tools. Many fingers are wrapped in bandages. Today I emerge from the basement, get accustomed to the daylight, clean up my act, and go out into the real world. I love these shows for the change of pace they offer.

I'll be back into a more normal routine next week. I'm looking forward to seeing my girls, my husband, and the sun, and catching up with friends and blogs that color my world.

Tuesday, February 2, 2010

block printing for all

Whenever "A" makes a piece of furniture, he marks it with an original carving—usually hidden (like on this table), always incredible. Recently, he decided he wanted to explore wood carving a little further, and try his hand a woodblock printing. With this, my mind started zooming. I wanted a piece of this action, and I wanted to introduce the girls to some block printing, too. Since wood carving requires very sharp tools, the girls and I opted for linocut. (...and then I remembered Maya's beautiful cardinal. Oh, the possibilities!)

I recalled the techniques that had gotten dusty in my head (too many years since the days of art school). After we fooled around with the tool and the different tips for a while, we all started to work the kinks out. Still struggling with controlling the lines, the girls decided they would create images that were mostly black (good call). Here's what we ended up with:

a second grader's solar system

a kindergartner's rose


a woodworker's tree scene

...and a metalsmith's hen (this is "Rocky", the beast who continues to eat her own eggs)

We have plans now, many plans—starting with more practice. Custom stamps for friends, prints on cards, teeny little icons to carve, as well as bigger woodcuts. Working in new mediums has a way of stirring up the creative juices that the daily work (in metal, for me) sometimes lets settle.

Monday, February 1, 2010

Use It or Lose It: The Series

Our One Small Change for January was to be more conscious about the food we have in the house, and waste less of it. So, for the past month we have made an extra effort to use up the produce and other perishable foods before they have a chance to rot. With a little imagination, we came up with (and found) some new recipes that include those cast away ingredients in the fridge. I'll be sharing those recipes here in a new series called Use It or Lose It.

I'm starting off the series with this recipe for Savory Tortilla Chips, in an effort to use those tortillas before they turn a fuzzy blue-green.

Start with a handful of tortillas and cut into quarters (the girls love any task that calls for the kitchen scissors).

Coat a baking pan with olive oil (or any cooking oil) and arrange the tortilla pieces in a single layer. Spray the tops of the chips with olive oil and sprinkle with chili powder, curry powder, and salt (use whatever ratios you prefer). Bake at 350° for 4-5 minutes, turn each chip over and return to the oven for another 5-6 minutes. Be sure to watch them closely after 4 minutes, as they can go from perfect to charred in a flash. The chips will be a bit soft when you first take them out but they will crisp as they cool.

The variations to this recipe are endless and, really, you could use whatever spice combo you can come up with. Plain salt and pepper would be great, or a sweet version using butter, sugar and cinnamon sounds delicious, too. Enjoy!

...and February's One Small Change is in the works, stay tuned.

Wednesday, January 27, 2010

Thirty-four

As you know, I've been featuring my husband "A's " creativity this week. The reasons are many, but he celebrated a birthday the other day, too, and this was my way of shining the spotlight on him. Here's how we celebrated his turning thirty-four:

His gift was this crazy little bonsai tree. Coupled with origami, you'd think he is a dedicated student of the Japanese Arts, wouldn't you? While it hasn't been a conscious decision, he has delved into both origami and the art of the bonsai whole-heartedly. And wait till you see his most recent creative endeavour—a decidedly Japanese art form (more on that soon).

We chowed down on some Root Beer Float Cake (do yourself a favor and try this). I am now Joy the Baker's biggest fan.

Remember the birthday tree? The pug ornaments made way for volcano ornaments, the "theme" of A's birthday celebration. It's funny, the girls insist that even the adult birthday parties in our house have a theme. With help from two small girls, A came up with volcano, and all agreed that is was boy-ish enough for the only male in the family.

I think it's worth mentioning some of the themes the girls have chosen for their parties over the years: unicorn, horse, Star Wars, Chicken, Star Wars Chicken (seriously), and last but not least, Jerry Seinfeld (don't ask).

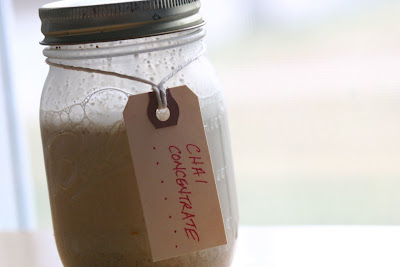
After seeing the recipe for chai concentrate on Amy's blog, I knew it had to be part of A's birthday gift (he's a big fan of chai). Then I started seeing it everywhere—bloggers from all walks were talking about it, all of them raving about it. And now I know why. Super easy, super delicious. (happy birthday to me?)

Monday, January 25, 2010

Paper Creations, Part II

After seeing Between the Folds, the PBS film about origami, "A" tried a few new kinds of paper forms, like this mushroom.

This paper is twisted, flattened, and crinkled rather than folded, and the resulting fungi are whimsical and delicate. He worked this up fast and it is actually quite simple to make.

There is so much amazing origami out there (like this and this and this). I am completely bewildered, knowing that each of those sculptures is made from a single sheet of paper.

If you're curious about origami, the crane is a great place to start. My girls (ages 6 and 7) can both manage a crane completely on their own, and they love it. (I would say 5 is a good age to start, as younger kids could be easily frustrated by the process.)

You can watch a clip from Between the Folds here. Check your local PBS listings to see the complete film, including how those mushrooms are made.

Sunday, January 24, 2010

Paper Creations, Part I

Origami. One more of A's seemingly endless talents and hobbies. Yet another skill he spends his time honing, along with playing piano, creating in his wood shop, or whipping up homemade candies. Over the years has folded scores of tiny animals—penguins, giraffes, chickens, humming birds, kangaroos, each one more amazing than the last.

Recently, he has departed from origami animals and is taking on modular polyhedra. That's a mouthful, I know, but it's just origami that is based on folding a simple unit over and over.

This giant star (or, stellated dodecahedron) was made from 30 sheets of paper folded exactly the same way, then assembled using interlocking flaps. It's surprisingly heavy and strong, but the true appeal is its sheer enormity. It virtually commands you to play with it. If you're up for the challenge the instructions are here

The magic origami ball is my favorite, and it's not just the name that won me over. This ball can be squished into an urn-like shape and tucked into itself to form a disc. It moves in and out like an accordion and it can take many shapes. It's irresistible. Speaking from experience, there's nothing better than a magic origami ball to dwindle away valuable time with. (Watch this video to see how it's made.)

He makes it so easy for me, really. Whenever I am lacking in my own time or creative endeavours to share, I always have A's latest and greatest to gush on about. More from his portfolio coming very soon...

Wednesday, January 20, 2010

Dino Factory and Turtle Love

I have been living in a prehistoric world for the past week and a half, and it's not such a bad thing.

Last summer I was contacted by Adrianne, the owner of a very cool online shop called Turtle Love Committee. She had seen my Triceratops charm necklace, loved it, and asked to see if some other kinds of dinosaurs might work as charms. She suggested a Brontosaurus, and Tyrannosaurus might have some appeal, too. Well Adrianne knows her clients, because before either of us knew it, she was ordering more. And then more. And then, yes, more.

The success of those dinosaurs at TLC has turned my workshop into somewhat of a dino factory as of late. They start off on a sheet of paper and are then glued onto silver sheet. Once the glue has set, it's time to break out the jewelers saw. Many saw blades and sheets of sandpaper later, I have these to show for it:

But enough about the dino charms themselves. I think you need to know a little more about Turtle Love Committee, who exclusively carries the dinosaurs, because this business has so much worth mentioning. TLC got its start selling unique wedding and engagement rings "for cool people," as the website puts it. After noticing that most women have the same engagement ring, Adrianne set out to offer alternatives to the overdone costs-as-much-as-a-car solitaires. She wanted rings that would symbolize a couple's commitment while preserving an individual's character. (As a woman who married in Vegas on a whim, I love this concept.)

TLC has since moved into offering non-wedding jewelry, too. Their collection now features pieces that focus on simplicity. They subscribe to the theory of quality, not quantity—having a few items of meaning, rather than lots of stuff that ends up in the trash.

As TLC took off, Adrianne decided to seek out jewelers who are ecologically and socially responsible (I promise I don't put my girls to work. Yet...). She talks to each artist "about their social and environmental impact, and being friendly towards people and the environment is TLC's core value." But the folks at Turtle Love Committee don't just lip sync these sentiments, read more about their commitment to making the world a better place here.

Turtle love really is a great thing. And so is dino love. I can't leave you without mentioning how much I have learned about dinosaurs throughout this venture. Did you know that the word dinosaur was derived from the Greek words meaning "terrible" and "lizard"? I didn't.