Showing posts with label children. Show all posts

Thursday, February 24, 2011

Teaching Kids the Magic of Color

The long cold days of winter are the perfect time to delve a little deeper into a few things I've been meaning to teach the girls. One such topic is color theory, and while the girls have known how to mix and make various colors since they were tiny, there's always room for practice. We also explored beyond primary and secondary colors, into tertiary colors and complimentary colors.


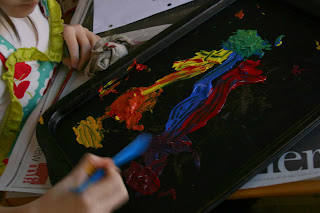
You want a big surface with enough space to mix lots of colors. I used baking sheets for this, and if you're using tempera or acrylic paints, it will wash right off with water. We started with only the three primary colors, along with one paintbrush and a palette knife. If you don't have a palette knife, you can substitute a butter knife or use clay tools, like we did.


Make a simple color wheel with blank spaces, and have the kids fill in the primary colors, and then have them mix the secondary colors. Encourage them to mix the colors thoroughly with the knife before painting.


From there move into tertiary colors, demonstrating how red mixed with orange makes red-orange, how blue mixed with green makes blue-green, etc...


After doing this exercise, my small girl exclaimed that there was no color she couldn't make. (I didn't have the heart to tell her about tone yet. YET.)


Next we talked about complementary colors, and how they relate to each other. We noted that they are opposite from each other on the color wheel, and that these colors tend to make the each other look brighter. Red and green, blue and orange, yellow and purple—all common color combinations that look good together


I encouraged them to mix the complimentary colors together, and the girls were surprised to see that they all made brown. We compared the difference between the rich browns we had just made and the brown straight out of the tube. It was clear to the girls the difference in richness of a color made "from scratch." We talked about how, really, we only needed the three primary colors, plus black and white in order to make any color they wanted.


In college, my professors were always telling us to make the color, not buy the color, and that a mixed color would have richness, depth, and interest that a factory color would be lacking.

Like a good recipe, it's the quality of each part that goes into the whole that's the difference between a ho-hum finished product, and an amazing one. Keep this in mind as you encourage your kids to make their own colors, using their knowledge of the color wheel as a guide. Their finished paintings will have a new level of interest to them, as well as an added level of involvement. And having kids push paint around with palette knives is a fine way to spend a long, cold day.

For more tips on teaching your kids to use color in their art, read my Beginner Drawing Lesson for Kids post on color.
Wednesday, October 13, 2010

How We Live Creatively

Almost exactly seven years ago, we found ourselves with a toddler, another baby on the way, a newly-purchased fixer upper, and very little income. It was time to get creative.

The mounting needs of our house and growing family was a turning point for us. Armed with time and a willingness to learn, we eventually shaped our lives and our home to fit who we are. Without realizing it, creatively solving everyday problems became a way of life for us.


How We Live Creatively As Homeowners:
Over the years, we have worn many hats. "A" has learned the ins and outs of plumbing, and become the resident electrician. He taught himself appliance repair, fixing our dryer and dishwasher by taking them apart and observing how they work, then finding the defect. He replaced our roof, completely renovated the kitchen, plastered a few new ceilings, and installed crown molding. (Of course, his trade is carpentry, so he did not walk blindly into many of the home-improvement projects he tackled.) He has also built many pieces of furniture in our house, the majority of which was made from scrap material left over from jobs.


 Me? I learned how to sew roman shades, refinish furniture, and install a thermostat. I became the household painting extraordinaire, furniture rearranger, and declutterer. I managed to repair our quilt, and rigged up a funky shower curtain to help with our weirdly-shaped bathroom situation.

We have made our home into a place that reflects us, not worrying too much how things will effect the resale value someday down the road.

How We Live Creatively As Parents:
We have all become teachers to one another. Informal art lessons as well as silly doodle time are regular occurrences, and art and craft supplies abound. At-home piano lessons give way to intense jam sessions with a recorder. Classical music plays on shuffle between U2, Pink Floyd, and Bob Marley.


There is nothing better than good ol' fashioned outside play, or a couple of crayons and a sketch book. A visit to the library, a walk to the playground, or a quick soccer game usually keep our girls engaged. We have multiple toy boxes full of toys, but they have languished, losing out to rowdy spy games with their neighbor friends. The girls have embraced their inner MacGyvers with their inventions and gadgets, and Daniel Boones, running free and plotting adventures, as kids should.


Our house is full of books—quite possibly, too many. Children's books, grown-up books, glossy picture books, a selection of the classics, and craft books for all ages and skill levels. So many books means there is always one within arms reach, to leaf through, pour over, or get lost in.


How We Live Creatively In General:
There are so many resources and opportunities now, which makes creative living quite easy. Anybody willing and able can learn a DIY method of doing just about any task these days. With the help of  books and online video tutorials, "A" has repaired our cars time and again, and we have even learned to fix our own tools. 

Creativity in the kitchen is something we all have to face at one time or another and, like most of you,  I have pulled-off some epic meals and snacks made from random pantry items. 

A little ingenuity goes a long way. Freecycle and Craigslist  are scoured regularly, and odd needs are fashioned from re purposed items. We barter, and trade services when we can. We search for information online, and call experienced friends for advice (or even better, for help). 

We have failed many times. Fixing the digital camera (friends, please do not attempt this at home) or figuring out where, exactly, the water dripping into our bedroom was coming from were forays we were not successful in. Sometimes we are victorious in our efforts, other times not so much.

We have also gone without, and learned to be grateful for what we do have. After all, it is times like these when living creatively—through creative problem solving—matters most.

Tuesday, September 7, 2010

5 Things: A Summer Summary

My first grader is quite excited to have homework of her own, now that she is a "grader." (I'm tempted to get some video footage of her homework enthusiasm so I can show it to her in 10 years). One of her assignments this week is to gather 5 things that represent what she did over summer vacation. As we gathered seashells, arcade tickets, carabiners, and more, I thought about what 5 things I would choose to represent my summer.
After giving it some thought, I decided that finding actual objects would be too ambiguous for me, so I chose 5 images, with words to accompany them, instead.

carousels (lots of them)

ice cream (lots of it)

initials (lots of them)

sand (dunes of it)

                                                    sisters (just two)


Wednesday, September 1, 2010

Beginner Drawing Lessons, Part III

Yay! Welcome to the third and final lesson in this three-part series: Color


Where would we be without color? The deep blue sea, scarlet poppies, and blazing sunsets would all be pretty nondescript without the hues that make them unforgettable.

There is so much to learn about color, but I'm going to keep it fairly simple here. While it is true that a strong foundation of color and color relationships will take an artist's work to the next level, for the purposes of this simple lesson, we'll skip the color wheel, so as not to bore the kids to death, and jump right to actually using color.


To start, let's go back to "seeing with our eyes and not our brains" (I know, I keep bringing this up, but it is one of the best things you can keep in mind when rendering objects). Just like the tomatoes of Lesson I are not perfectly spherical in shape, nor are they just red. On a single tomato we can spy red, orange, yellow, and deep crimson, and even a hue that seemed somewhat blue, not counting the greens of the stem and browns of the blemishes. It is precisely this myriad of color that makes an object interesting when rendered.

Take a closer look. See the variations. Encourage your kids to believe that they really are seeing colors that don't necessarily "make sense," like blue on a tomato.There are many reasons for seeing that blue, like a reflection from a nearby object, or the combination of a particular shade of red, mixed with the low-value tones of a shadow.


Even if your subject is a factory-made piece of purple plastic that features a consistent shade, that purple is going to appear slightly different, depending on how the light and shadows are effecting it. So, you see, nothing should ever be rendered as just one color, even if it is...just one color.


Color Exercise:
For this lesson, you will not necessarily need to set up a still life. In fact, drawing from nature would serve this lesson best, as objects that occur in nature tend to have many variations in color.
  • Take a walk with your kids around the yard or inside your home. Point to objects and have them say the first color that comes to mind, like "green!" for grass.
  • Next, have them take a closer look. If they can, have them touch the object, and look at it from all angles, noticing color differences. For example, a leaf might be bright green on the top, but a muted yellow-green on the underside. See if they can recognize more colors than the original one-word answer.
  •  Once your kids start drawing their objects, encourage them to use as many different colors as possible. A peach could be drawn using orange, red, brown, and yellow, as opposed to coloring it light orange in one place, dark orange where the shadow is.
  • Once they are comfortable with using so many colors, ask them to draw an object using a completely different set of colors. They could take a small collection of blues and oranges and render a leaf with shadows and highlights using the wacky colors. The end result will be an eye-popping composition. 
  • For and advanced challenge, try drawing a set of objects using only blocks and patches of color—no lines—like we did with value in Lesson II.
If you're you're interested in exploring color a little further, Marmalade Moon just posted a great list of color inspiration links.

I hope you and your kids enjoyed this Beginner Drawing series. I plan to expand upon these lessons in the future, and will keep you posted on that front, as details emerge.

    Monday, August 16, 2010

    Beginner Drawing Lessons, Part II

    Welcome to the second lesson of this three-part series: Value

    In art, value refers to the darkness and lightness of color or tone. The variations in light and dark within a drawing are what will make it come to life. Have you ever noticed how an unexpected highlight on an object makes it really pop? Or have you felt the depths of a darkly-rendered shadow? Yep, it's all about value. From the highest value—white, to the lowest value—black, and everything in between—this is what creates volume and sense of space and depth.

    In our still life of the group of tomatoes, we first took note of where the different light sources were coming from. Then we noticed where the brightest and darkest parts of our scene were. After those easier to identify values were determined, we discussed the more subtle shades, looking at how the lighter parts of the tomatoes fade gradually into different shades of darkness. This lesson is meant to be practiced in black and white, using pencil/charcoal on paper, so kids won't confuse light and dark color with light and dark value.

    There are different ways to render value. Some artists use cross hatching, others use sketchy lines or scribbles, others blend their pencil/charcoal to create gradual changes.

    A good way to practice different values of light is to make a value chart. Simply draw a rectangle about 6" long and, starting with white, gradually sketch darker and darker values across until you have the darkest possible color your pencil can make. Show them how they can create darker colors by bearing down harder on the paper, as well as by using more lines closer together.

    Value Exercise:
    • Start by having your kids make a value chart. This will help them recognize the subtleties in all the shades between white and black.
    • Have them try a few different ways of shading, and let them chose the method they prefer.
    • Using a simple still life like the one in the previous lesson, ask your kids to tell you where the light is coming from how it is shining on the objects. It may help to set up the still life next to a window or a lamp, so that there are strong lights and darks for them to identify. You could even rig up a flashlight to make extreme shadows.
    • Next, ask them to point to the brightest and darkest parts of the objects. Once those are established, have them take note of all the different shades in between.
    • When they begin to draw, encourage them to use their value chart as a reference. Suggest that they use the white of the paper as the brightest spot, and fill in the lower values from there.
    • If the kids are into it, ask them to try drawing one without using any lines at all. See if they can render objects just by creating various values.
    Have fun! See you back here soon with the last lesson: color.

    Sunday, August 8, 2010

    Beginner Drawing Lessons, a Three-Part Series: Part I

    NOTE: My apologies to those who subscribe in a reader. I accidentally hit "publish" in the middle of my first draft of this post. I deleted it immediately , but I think some of you still got the wonky post. Oops!

    Welcome to my Beginner Drawing Lessons, written with kids in mind, but perfect for adults, too. This series is the result of many sketching sessions with my girls, during which I realized there are a few recurring concepts that I am always reminding them of. For these lessons, I have reduced lots of information into three basic ideas that can be utilized when drawing:
    • Line
    • Value
    • Color
    There are the shapes and how they relate to each other (line), there is light and shadow (value), and there is color, with its many variations.
    Those three things are basic concepts that, once understood, will help you or your child have a better grasp of your subject matter. This information can also be applied to painting, sculpting, digital art, and so much more. Each of the three lessons include an exercise at the end of it, so you can practice your new skill. I would recommend this series for children 6 and up.

    The first lesson of this three-part series is Line.

    Line is the shape of objects, the actual outline, and how shapes relate to each other. For example, in our still life of a group of tomatoes, we noticed how each tomato looks different—some had more lumps, some were more round, some oval in shape. Then we looked at how the tomatoes were arranged. We saw how some were in front of others, and that some were partially hidden. Look at where these objects overlap, as well as the negative space. Sometimes, when an object proves tricky to draw, observing the shape of the space between the objects can be helpful.
    Encourage the kids to look at the true shape of things, meaning not what their brain says they should see but, rather, what they are actually seeing. Our minds register "tomato" as bulbous and round in shape, but their shapes can be quite varied. Point out irregularities in objects, and encourage your kids to include those. We (and especially kids) tend to want to draw the "idea" of a certain object, rather than what we are really seeing. A college art teacher of mine used to always say, "draw with your eyes, not with your brain."

    Line exercise: Set up a still life made with a few simple shapes. Fruit, balls, bowls, and vases (skip the flowers this time) are good choices for this first exercise. Avoid objects that have a lot of detail on them, as the kids will be tempted to render all that detail first thing.
    • See if you can get your kids to just observe the still life for a few minutes before starting
    • Talk about the outlines, the shape of the negative space, the places where objects overlap each other, and how that effects their shapes
    • Ask them to point out irregularities in the shapes
    • have them trace the objects with their finger
    • When they begin to draw, remind them to draw what they see, not what their brain tells them a shape should look like
    Have fun! See you back here soon with the next lesson: value.

    Sunday, July 18, 2010

    Why I Won't Look At The Calendar

    I'm still here, and all is well. Just haven't been here.
    The momentum of summer has taken over, and I find myself in places far away from the computer. It's refreshing.
    In my absence:

    We found a rainbow

    I made a whole lotta circles

    The girls set up an outdoor living room, complete with a couch (see it at the top of the picture?)

    We took an evening trip to the beach (this was taken at 7pm, and it was still 95 degrees)

    And I've enjoyed some lounging around

    Lately, I have an ever-increasing sense of dread, as these days tick by and I face the reality of my baby entering first grade--full day school for the first time. Come September, both my girls will be spending their days away from home, leaving this mama to fend for herself. Now, I have plans--big ones--to make good use of that time and grow my business, but this change is just so symbolic. This is the way it will be for the rest of their childhood. I know that's life, and that I'm being dramatic, but it's what I'm feeling at the moment.

    What's a mother to do, but make the best of the time we have right now? To linger at the beach, play long card tournaments, and let them stay up late to watch Wipe Out, so we can laugh together--these are the current priorities. And when school comes around again, I'll kiss both girls goodbye with a pat on the bum, and rush home to make hay while the sun shines, reveling in this new phase of parenthood.

    Until then , you can find me here a little less than usual. I'll be doing everything under the sun with my girls (except looking at the calendar).

    Monday, July 5, 2010

    Bringing the Oustide In

    Come out for a tour of the girls' bedroom,

    where butterflies alight,

    and doves fly.

    A place where roses unfurl no matter the season,

    daffodils bloom all year,

    and the sun shines every day.

    It's a dreamy place to sleep and play

    Friday, June 25, 2010

    What To Do

    We're only a few days into summer vacation, and I have found myself scouring my favorite blogs and sites, looking for crafts to do with my girls a few times already. Turns out, there is a ridiculous amount of brilliant ideas and resources out there—tutorials, recipes, suggestions, and even more lists of things to do. Jackpot!

    I've compiled a list of my favorites for you and me :

    Paint a fresco (FuoriBorgo)

    Make your own bug catcher (Shivaya Naturals)

    Craft up some clay suns (Twig and Toadstool)

    Make some Custom Drawn kid stationary (Just Something I Made)

    Have your kids make their own ink Blob t-shirts (Vintage Chica)

    Make mobiles from found drift wood and beads (Wise Craft)

    Try some corn syrup painting (The Crafty Crow)

    Make a moss terrarium (Poppytalk)

    Learn block printing: tutorials Part I & Part II ( from me!)

    fold up some Origami paper wallets (Future Craft Collective)

    Squeeze some fresh orange juice and make sun eggs (GardenMama)

    And more lists to pour over!

    The Long Thread's round up of 50 Summer Crafts for Kids (check out the Stone Dolls from MayaMade)

    list of great games to play with kids over at Mommy Coddle

    List of outdoor summer activities at 5 Orange potatoes

    list of Artful Books for Children from Quince and Quire

    and this list of resources for nature-based summer learning, from The Snail's Trail

    Friday, June 18, 2010

    This Moment

    Hoppin' on board the Soule Mama train this week to share this moment.

    {this moment} - "A Friday ritual. A single photo - no words - capturing a moment from the week. A simple, special, extraordinary moment. A moment I want to pause, savor and remember."

    Saturday, June 5, 2010

    Confessions of a (Former) Consumerholic

    Hi. My name is Amy, and I am a consumerholic.

    Or, I was.


    A handful of years back, I suddenly found myself with babies and a newly purchased home. If ever there was a time to purchase things, I thought this was it.

    I bought items that the babies might like, and things I might use for the babies. I shopped for a mind-boggling roster of tot gear, and had a hard time resisting those adorable tiny clothes. Then there was a home to fill. I paid hard-earned money for things like outdoorsy-scented candles, newfangled cleaning products, and the latest in clocks.


    Well, it wasn't long before my house reached maximum capacity. By then, the majority of baby gear had proved superfluous, and the tot stuff was collecting dust in the corner. The candles lost their scent, the cleaning gadgets were useless, and the clock broke long before I expected it would.


    Standing in my living room one day, planning my route across the toy-strewn rug, I had a vision. I saw my home in all its de-cluttered glory. I saw my girls playing with quality handmade toys that wouldn't soon be recalled. I imagined a cozy nest decorated with items made by fellow artists, each piece holding its own story. I fantasized about all-natural cleaning products, and cooked up clever ways to re purpose lackluster items.

    Without realizing it, I was formulating a new family plan. It would be based on quality, simplification, and time spent together.

    The simplifying scheme started with charity donations—truckloads of clothing, unwanted toys, and household items went out the door. I read voraciously about simple living, conscious consumption, creative parenting, and commercialism. I re prioritized how we spent our time, and shifted from days full of running errands to staying home and interacting in more meaningful ways. I bought large quantities of basic grocery store ingredients and learned all the amazing ways they can be used in a household. I came to realize that my spending habits are a reflection of the kind of world I want to live in.


    During this time, I hatched the idea to sell my works in metal, as a way to bring quality handmade pieces to the market. I thought, maybe if somebody bought my pieces they’d be less likely to buy cheap costume jewelry made in factories on the other side of the world.

    This new way of living is very much a work in progress. I have spent the past six years steering my family towards a life of simple abundance—of shedding the excess—but we often veer off course. The toy box has been replenished with cheap imported junk (this is our biggest challenge, as most of the girls' toys are gifts from others, for which we are grateful), and Mount Stuffed Animal remains the last frontier. I have to admit we adults in the household have some indulgences of our own, but we try to keep it in check. I have gotten more organized, and we have learned to patiently wait until we’ve saved enough money before making purchases—this alone has been the most effective way to keep the amount of things acquired to a minimum. We have also found a better balance between family time and the number of activities we participate in. Generally speaking, our down shift has been a success, but we are presented with challenges daily.

    As long as I can navigate my way across the living room without too many obstacles, I know we're doing OK.

    Tuesday, May 25, 2010

    A Family of Four...

    Once, we were a family of four, plus a cat.
    Then, a family of four plus a cat and 4 hens.
    Now...

    A family of four plus a cat, 4 hens, and General Hop (photo courtesy of my talented photographer sister)

    ...and Woolly Bear, our very own Isabella Tiger Moth in the making

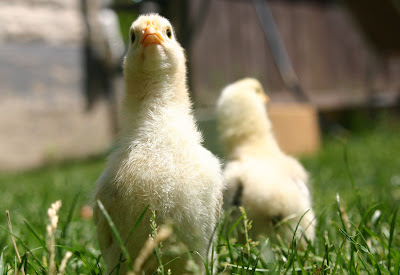
    ... and three new chicks, named Han (as in Solo), Ambroult Ambroult, and Poofey.

    That makes 30 legs, as the girls like to say. (Oh wait, I guess it's 44 legs. Or 32, depending on how far along in metamorphosis the caterpillar is.)

    What, or who, is next? I could not predict. But I really hope it doesn't have too many legs.

    Friday, April 30, 2010

    Corner View and More of the Outdoors

    After a bit of a departure from the Corner Views, I am happy to be back with this week's prompt: "animals."

    This is our "yoga kitty," who sleeps on his back, with his head and shoulders twisted, arms hovering in the air. It's bizarre. A certain six year old couldn't resist putting her head between his paws and pretending she is being snuggled with, but he is sound asleep.

    I also flaked out on the Great Outdoor Challenge last week. Oh, we got outdoors, and I got pictures, but I just forgot to include them in my posts. So here's a few to finish up the month-long celebration.

    Who doesn't love a chariot ride?

    I got all paparazzi the other day and tried to sneak a few shots of the kids in their secret hideout.

    But alas, the camera shutter gave me away and security swiftly moved into action. I was told "no pictures allowed, Mama," followed by pleas of "Don't put that picture on your blog, nobody can know where our hideout is!"

    Don't tell, OK?

    Happy Weekending!

    Wednesday, April 28, 2010

    All In A Cookie

    We love cookies. And batter, and books, and knowing where our food comes from. So a few years ago when I found the book All in Just One Cookie, I knew we had to have it. This hysterical book takes the reader through the process of making a batch of chocolate chip cookies. With each ingredient, it chronicles its source, and how it is made/processed. I had no idea baking soda starts as a mineral mined in Wyoming that is then mixed with hot water and carbon dioxide. The resulting chemical reaction produces baking soda crystals.

    I think about local foods often, and we do our best to stick with local produce. We have also recently taken steps to buy meat from this area. But as far as baking goes, I have no idea where many of the ingredients come from. Why have I never investigated this before? A bit of research yielded local and semi-local sources for some of those ingredients. With that in mind, we set out to make our favorite oatmeal chocolate chip cookie recipe.

    ...with eggs from our back yard, and butter from Maine

    flour and oats that could be purchased from the Pioneer Valley Heritage Grain CSA

    The chocolate chips could be substituted with chopped chocolate from Taza Chocolate

    ...and the labor, willingly provided by two little gals who'd rather eat the batter raw.

    That leaves the vanilla, sugar, baking soda, and salt for the non-local ingredients. Could honey be substituted for the sugar without ruining the texture? Why isn't salt produced on Cape Cod anymore? I'm dreaming of sources, hoping for more luck.

    Imagine. All in just one cookie!